In this tutorial you will learn to animate a simple character in Mighty Editor.
Download assets.
First – lets download the assets we will be using in this tutorial.
Click here to download .zip file
They are free to use for your experiments and non-commercial projects.
Setting up.
Import all of the images from the zip file in the editor. We will be using them for the animations. (Tutorial on how to import assets here)
Now lets select the stamp tool and place all the objects on screen. We chose a simple game character for the tutorial so it’ll be easy to animate. (Tutorial on how to use stamp tool here)
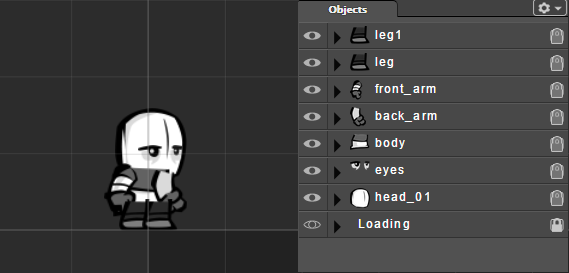
After all of the objects have been placed on screen rearrange Z-order in “Objects” panel so that objects overlap each other correctly.
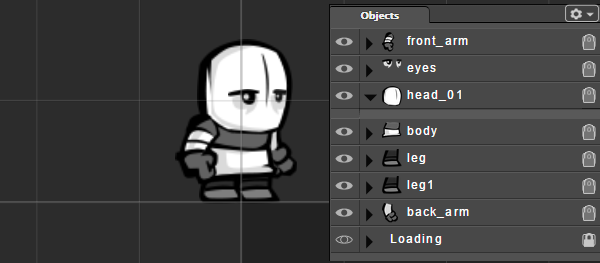
Grouping objects.
After we have finished rearranging object z-order, we have one change in object structure.
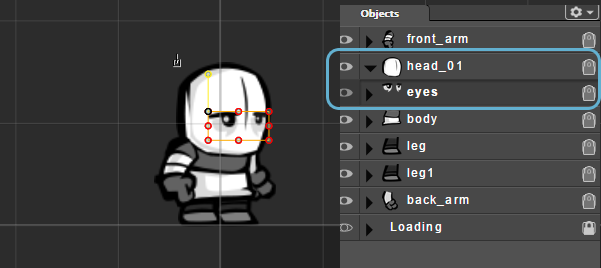
To make animating easier – we want our eyes to move together with the head. In object panel select object called “eyes” and while holding your left mouse button down drag them on top of object called “head_01”. This will put the eyes in head container and now when we move head object the eyes will move with it automatically.
Setting anchor points.
After we have everything on screen you should adjust anchor points for all the objects according to how you want to animate them. In this example you will be animating character limbs so i put anchor points to places where i imagine the arm/legs have joints. You can move around the anchor point just by clicking on the point and dragging it around. Originally it is located in top left corner of the object bounding square. Objects will rotate around anchor points. And they have long yellow line coming out of them vertically.
[Put the anchor points approximately here]

Creating main group.
Before we start animating i like to put all objects in one group that we can interact with later. its also easier to manage the scenes later if you choose to add multiple characters on screen and in case of cinematics. Select all character parts and group selected objects. Hold Shift to select multiple objects. (Tutorial on working with groups here)
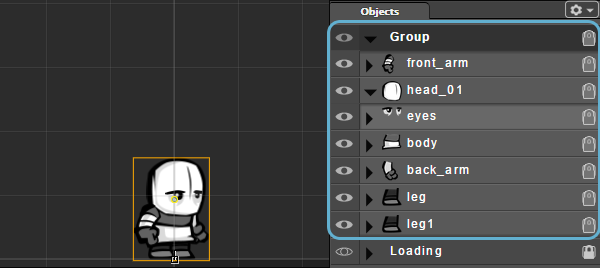
Select the group that should be called “group” in the objects tab. And then click on “New Movie” button in the bottom panel. A panel with timeline and all your objects should appear. You can view all objects by resizing the panel or simply by scrolling mouse wheel.
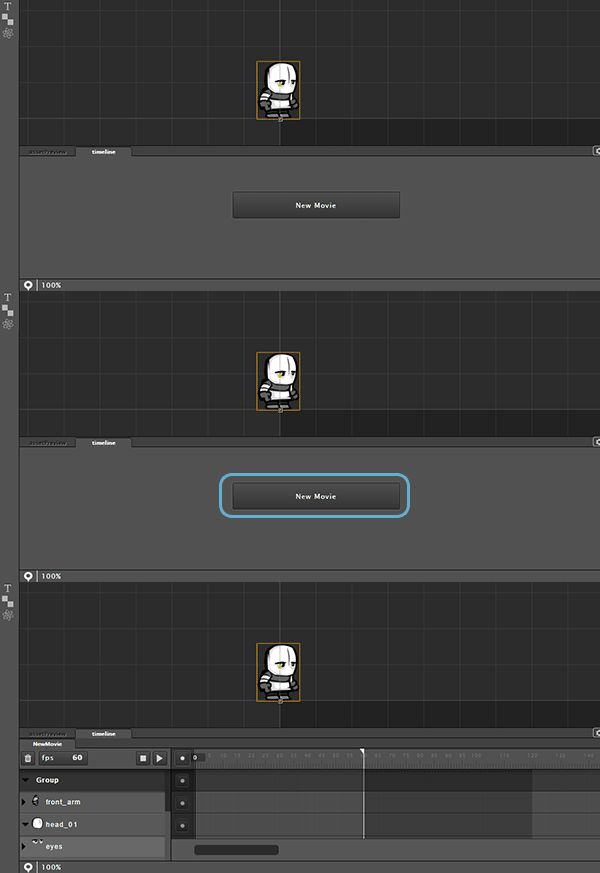
If you accidentally lose this view, just select the “Group” in Objects panel with the left mouse click and then all the objects/timelines associated with animation/movie clip will appear again.
Scale object – Use dots on edges of the bounding square to scale the object. gif
Move object – Drag and drop object around the screen to move it. gif
Rotate object – Use dot on the end of anchor point line to rotate the object. gif
Setting first keyframes.
Now we will create a simple animation.
First we will set starting keyframe for all of the objects by clicking “Set keyframe” button.
[important] To add keyframe to all objects in current frame you must make sure that no objects are selected. If some objects are selected deselect them by left clicking empty space on viewport.
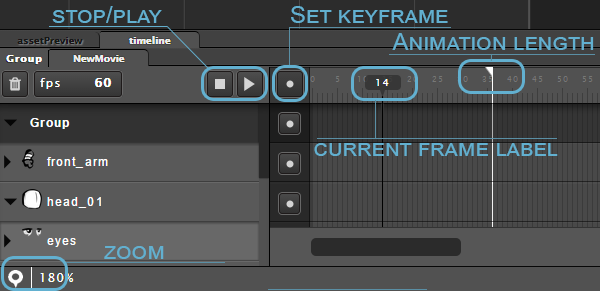
Now that we have set the initial keyframe drag the “current frame label” to frame 20.
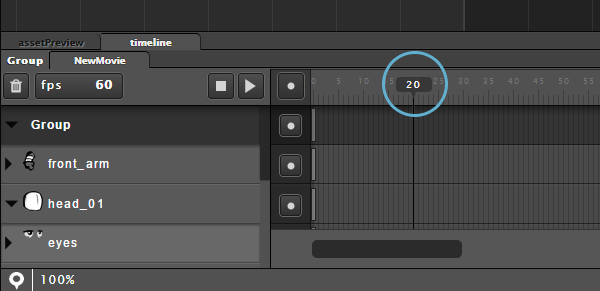
Animating character.
When you have moved to frame 20 you can now arrange objects for our second pose.
In this gif you can approximately see how i move around the objects to the “breathe in pose”, you can follow these steps to achieve similar result.
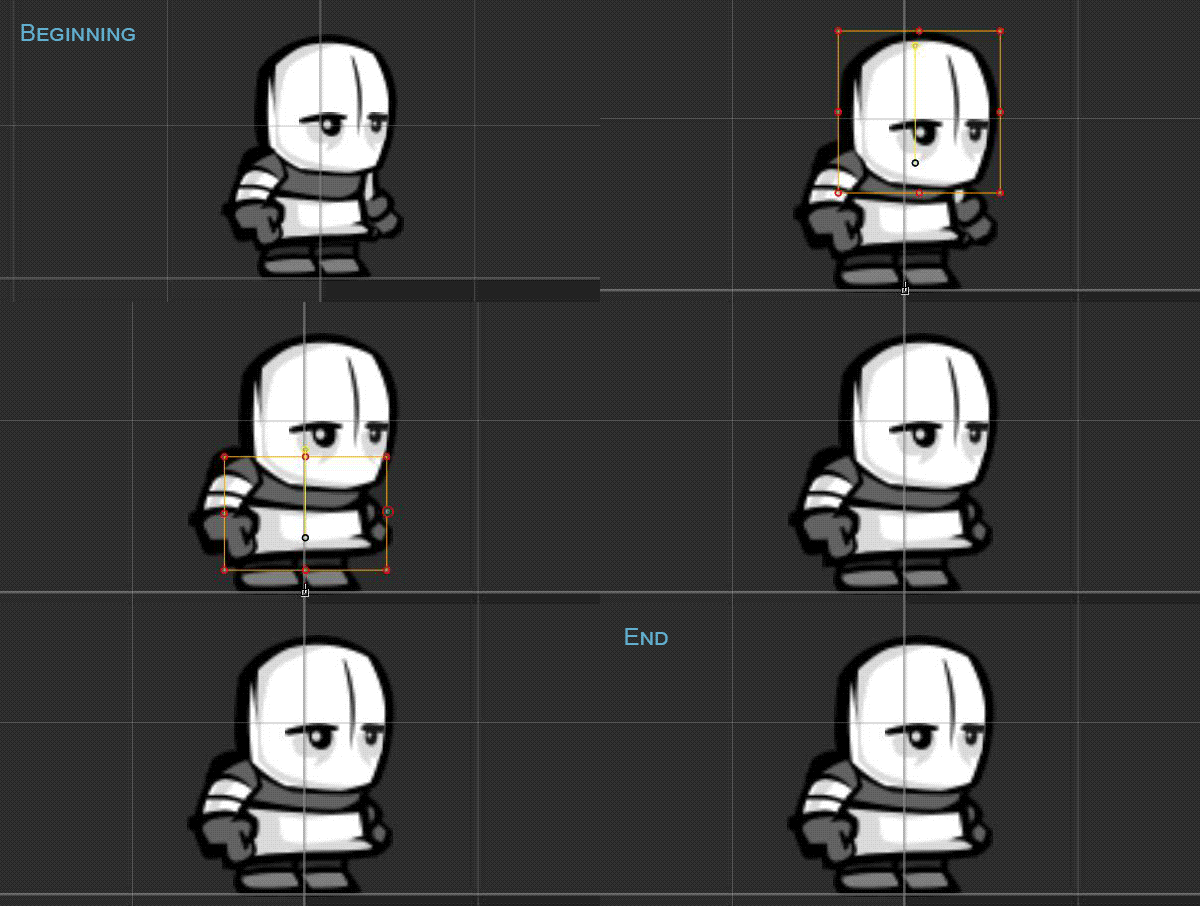
When you have finished setting the positions and scaling the objects – deselect all objects and set a keyframe there by pushing “Set keyframe” button like in the first step.
Creating animation loop and setting length of movie.
We now have the first part of the animation done, now we want the animation to loop to the first frame. to do that we drag the “current frame label” to frame 0 and press Ctrl+c while no object are selected that will copy all of the keyframes from current frame. Then drag “current frame label” to frame 40 and press Ctrl+v. This will paste all of the keyframes that you have in the clipboard in the selected frame.
if you press play you will notice that the character will be frozen for a large chunk of the animation in the end. That is because we have the animation length set to default 60 frames. We want to change animation length to 40 frames – the length of our actual animation. You can do that by dragging flaglike white line to frame 40. That will set our animation length to 40 frames.
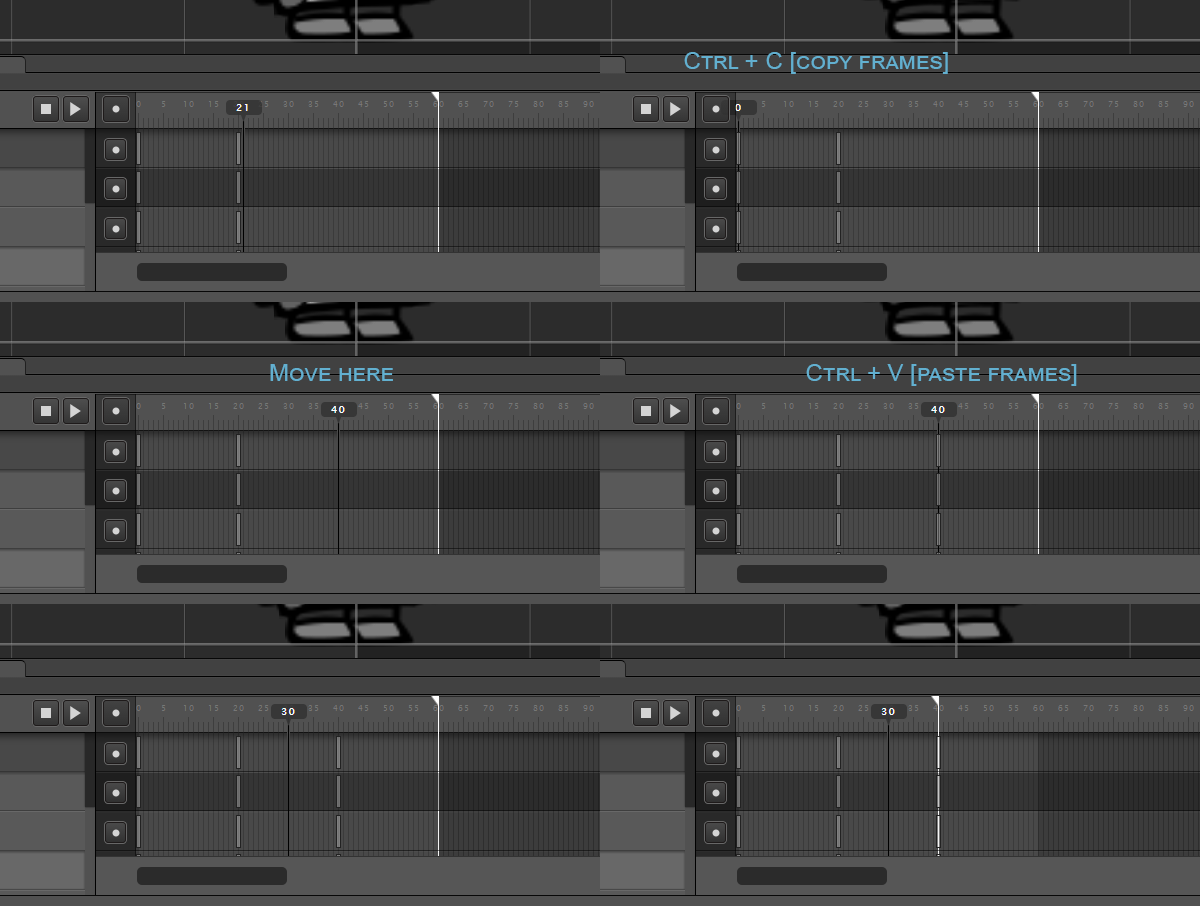
Press play, and now the animation should be looping.
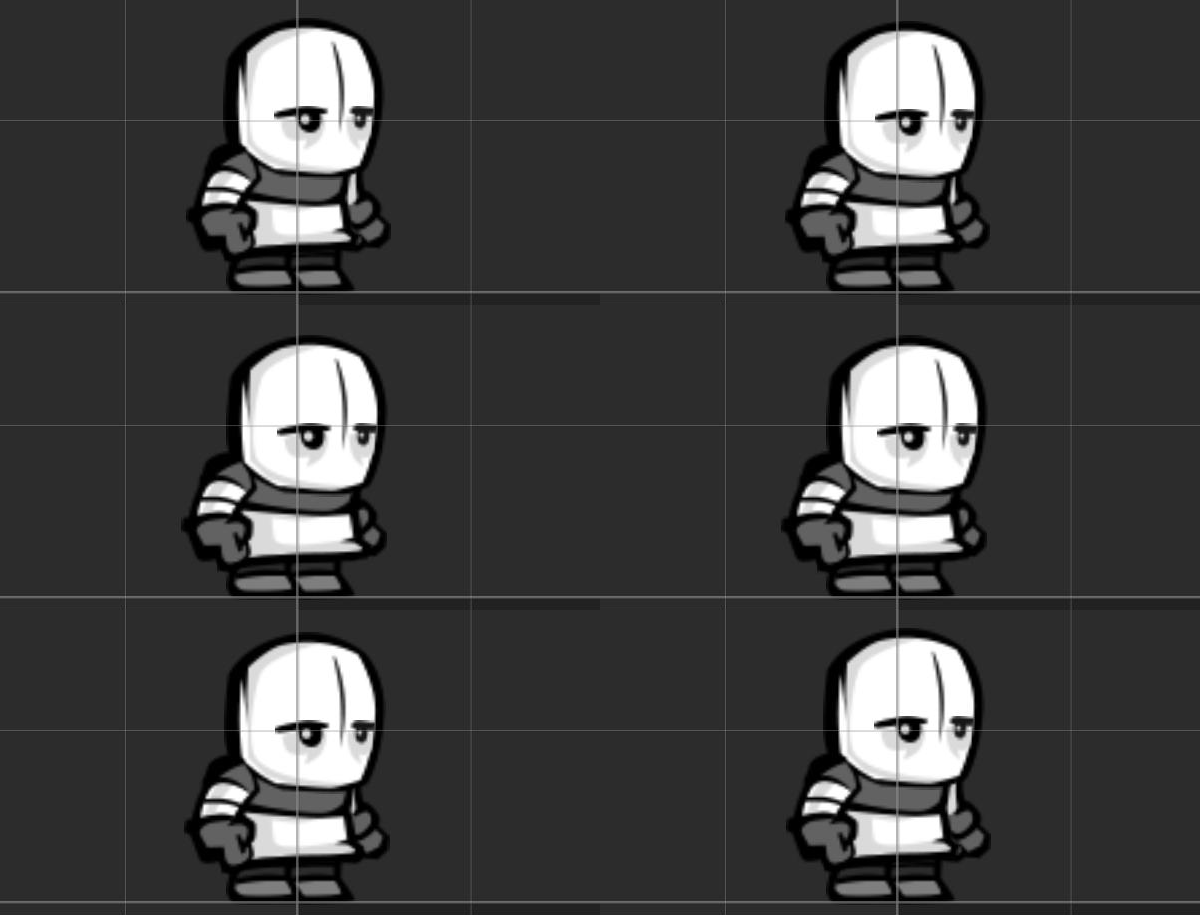
Congratulations you just made your first animation with MightyEditor! 
Useful shortcuts.
- Ctrl + Z – undo
- Ctrl + Shift + Z – redo
- Ctrl+click – select parent group. really useful if you decide to create object systems
- Ctrl + X – cut
- Ctrl + C – copy
- Ctrl + V – paste
- Shift – Select multiple objects from sidebar/scene
- Alt + drag – Duplicate selected object
- Ctrl + drag – Snap objects to grid
Useful things to know.
- Turning off the grid – go to settings panel and change parameter “showGrid” to “0”
[insert picture here] - Scroll on timeline – zooms in timeline
The animation is a good feature!
I have still struggle getting it to work the way I want, but nonetheless want to provide some tips.
It took me a while, before I checked the forums and found out how to actually start the animation:
http://www.html5gamedevs.com/topic/10841-animation-editor/
It’s done like this:
——–code start——–
this.ani = mt.create(“animatedGrafix”);
// the animatedGrafix ist the group from the Map Editor
mt.createTweens(this.ani);
this.ani.mt.movies.MovieName.start();
this.pig.mt.movies.MovieName.isLooping = true;
——–code end——–
By the way, for anyone wondering how to give your animation sequence a name (“MovieName”). You need to doubleclick on the tab of the timeline (by default it says “new movie”) and enter your name. I only found this out be coincidence.
Thanks for pointing out Henryk! We are working on more tutorials right now there are two new:
1) Creating animation from code http://mightyfingers.com/tutorials/animation-editor/create-from-code/
2) Basics of tween animation http://mightyfingers.com/tutorials/animation-editor/basics-tween-editor/
Also we’ll cover soon topics: main timeline, easing
¿you can export the animation tool as plugin? would be great to load the keyframes from a json! 😀
Thanks in advance, Nicholls
Hi Juan. Not sure what you have asked. Do you want to import a json file to editor?
Hello,
once we create the animation from the code, how can we change the position? cant seem to change the x and y values
Hello there!
How do you delete/clear keyframes in timeline?
Ctrl+V, Ctrl+C, Ctrl+Z don’t work for me on Safari or Chrome on OS X, is this a browser or OS issue?
If I want to show/hide objects in a movie (e.g. lightbulb with on/off art) is only way by switching alpha setting?
Thanks!