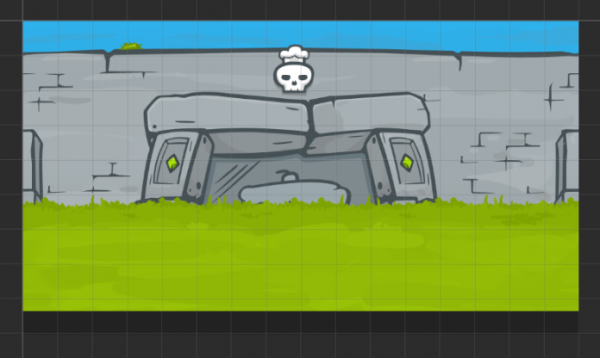
To create a map in MightyEditor, simply select the ‘stamp’ tool in the toolbar (left side), then, from the asset panel, select the asset you want to place and finally – put it on the map (hold CTRL to snap to grid). Usually, the first thing you place, when creating a map, is the background.
The example above consists of two assets (images) – the temple and the grass. Temple was placed first, so that the grass would be on top. After that, place other objects wherever you please. A game is usually composed of multiple objects: background, character, hazards, platforms and a goal. All of these things are placed by using the same stamp tool. To select an already placed object, use the ‘arrow’ tool.
All placed assets should be withing the dark-grey area of the map editor. For information about world and viewport sizes refer here.
There are some map settings to fiddle with (accessed by clicking on any blank part of the map):
- cameraX & cameraY – the current coordinates of the camera, more precisely – the upper-left corner of the camera);
- world and viewport dimensions – refer above;
- gridX & gridY – the dimensions of individual grid cells in pixels;
- showGrid – enable/disable the grid visuals;
- backgroundColor – the colour of the background (click the small box for colour picker).
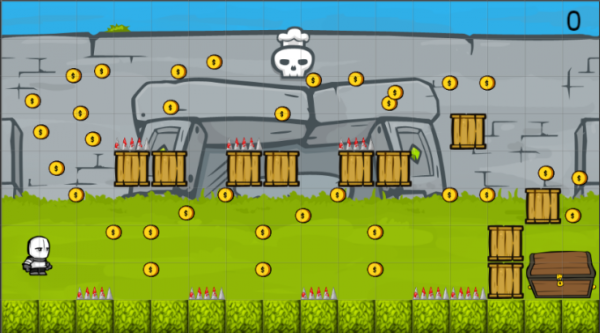
For example, a simple platformer would look something like this – boxes are neatly snapped to grid, as are the spikes and grass tiles, background stays in the back etc.:


Hi, how can i make isometric map ? I can’t found the plugin tab and the offline version don’t work. :/
Hi Hugo,
we don’t have isometric option yet. You can try to download offline version from github and combine it with isometric plugin http://www.html5gamedevs.com/topic/8387-phaser-isometric-plugin/
What exactly doesn’t work in offline version? Which OS do you have?